Facebook, The Biggest Social Network
Since Facebook's inception in 2004, it has grown to become one of the world's most popular online destinations, with over 2.8 billion monthly active users worldwide.
The platform enables users to create personal profiles, share content, and engage with others through posts, comments, and messages. It offers a dynamic space for individuals to connect with friends, family, and communities, while also providing businesses with an invaluable tool for marketing and customer engagement.
Setting Up Your Facebook Advertising Account
Ready to expand your business reach with a Facebook advertising account? Let Market Ninja guide you through the process, ensuring seamless setup and effective campaign management.
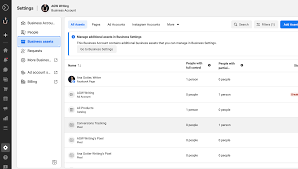
Step 1: Create a Facebook Business Manager Account
Visit the Facebook Business Manager website. Click 'Create Account' and provide your business name, your name, and email address. Confirm your email to activate the account.
Step 2: Set Up Your Business Page
If you haven’t already, create a Facebook Business Page. Navigate to the 'Pages' section in Business Manager, click 'Create Page', and follow the prompts to set up your page with relevant business details.
Step 3: Add Your Advertising Account
Within Business Manager, go to 'Accounts' then 'Ad Accounts'. Click 'Add' and select 'Create a New Ad Account'. Fill in the necessary details such as account name, currency (GBP for the UK), and time zone. Assign the ad account to your business.
Step 4: Set Up Payment Method
In 'Business Settings', locate 'Payments'. Click 'Add Payment Method' and enter your payment details. Facebook accepts various payments, so choose the most convenient option for you.
Step 5: Assign Roles and Permissions
Go to 'People' in Business Settings to assign roles. Add team members and grant them necessary permissions based on their responsibilities (e.g., ad creation, analytics).
Step 6: Install the Facebook Pixel
To track and optimise your campaigns, install the Facebook Pixel on your website. In Events Manager, click 'Set Up' then 'Install Pixel'. Follow the guide to integrate it with your site, enhancing data collection.
Step 7: Launch Your First Campaign
Navigate to 'Ads Manager' and click 'Create'. Choose your campaign objective, define your audience, set your budget, and design your ad. Once satisfied, click 'Publish' to start reaching your target market.
Now, your Facebook advertising account is ready to drive business growth. For further assistance or to optimise your strategies, consider leveraging Market Ninja’s AI-powered platform. Let us help you craft impactful campaigns with ease.
No blog posts found.
What do you think?
Ask a question, make a comment or provide your thoughts and advice.
Reviews
So easy it's made marketing much clearer and understandable for me and my staff.
Fantastic App, it has everything we need to manage and execute marketing campaigns.
I've used all the apps on the market and can say hands down this is the easiest to use.
✅ Thank you for your comment!
Your comment will be reviewed and published shortly.
❌ Sorry, there was an error posting your comment.
Please try again or contact us directly.
No comments yet. Be the first to share your thoughts!